-
Saturday, August 30, 2014
Saturday, August 23, 2014
New Printable!
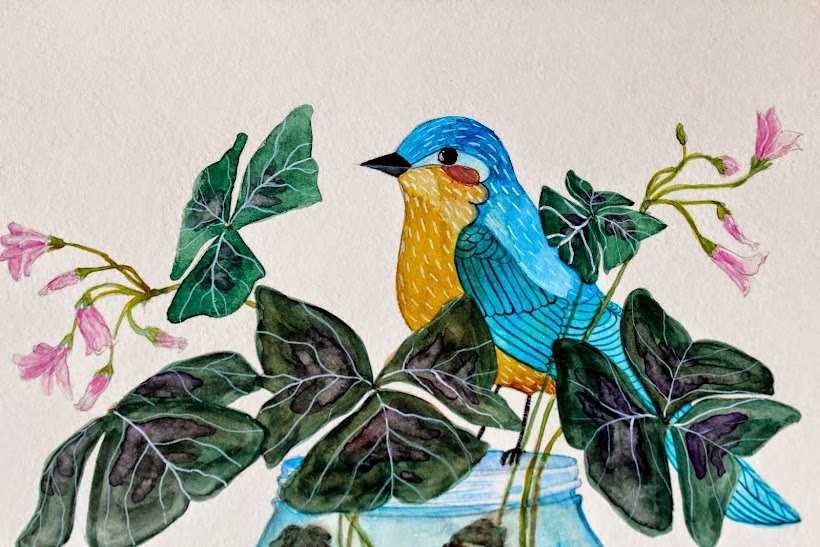
Getting in a free printable just for you and just in time before the school year begins! I hope you enjoy! I've had friends begin embroidery projects with the last printable and others who painted the image and turn it into a one-of-a-kind work art. I hope you enjoy! Let me know what you come up with!
Monday, August 18, 2014
Fall Frenzy Continued...
Hey! Just finished two more paintings I'll be selling as prints on Etsy. They're fun, they're festive, they're definitely Halloween.
The red-winged black bird has a ton of detail and I'm super jazzed about the oak leaves and acorns. I think my favorite thing about the piece is the lacy spider web that runs long the old book cover.
The next piece is of one of my most favorite animals - the OWL! They just seem like they have endless wisdom to share and are very regal. When I'm at the National Zoo, I'm always stopping by the owl exhibit and lingering just a little longer to study all of their beautiful intricacies. For this print, I used a lot of irredescent powders, pastels, and inks that play well together and lend more (I think) to the owl's magic and mystery.
Things are definitely getting "Fall Festive" around here! Now... Off to go create! Thanks for stopping by. :)
Sunday, August 10, 2014
DIY - Create an Edison Inspired Light Bulb Stamp!
Lately I've been spending a lot of time on my illustrations in preparation for the opening of the Wild Heart Histories art shop on Etsy. It' been tons of fun, but for someone who has the attention span of a two year old - it is definitely time to switch things up. So what to do... hmmm...I know!!!
Enter stage left - my print making materials! Yay for print making! Just thinking about it gets me all excited (dorky I know).
Anyway, I thought I would share my adventure in print making with you. Who knows? Maybe you'll want to give it a go!
So... Lately I have been really fascinated with Thomas Edison's lightbulbs. They are so beautiful to look at and give off such a warm, soft glow at night. The way the wires inside come to life - it's just pure magic. I love the different shapes and the definite vintage vibe they have so they will be the focus of today's printing project.
All of the supplies for this project are available at Plaza and Blick art supply stores as well as on Amazon. Here's what I'm using:
-tracing paper
-5B drawing pencil (super soft lead makes for an easy image transfer)
-Staedtler Mars Plastic eraser
-Speed Ball linoleum cutters (most cutters come with a variety of blades)
-Speed Ball "Speedy Cut"rubber block 6 3/4" x 11"
-a cutting knife with smooth blade (No ridges! You can use a razer, but I just get a knife from my chopping block because the handle makes it easier to work with)
-ink pad in the color(s) of your choice
-paper of any kind you want to print on
-scratch paper to test your stamp on
-pictures/images of the design you want to create
Now that all the materials are gathered, it's time to select an image. I've been playing around with a few light bulb shapes I found in my research and think I'll go with the standard bulb to start. Using my 5H pencil, I'm going to lightly sketch out my image onto tracing paper and when I've created the final image, I will trace it heavily so that the pencil lead transfers onto the linoleum.
Next, take the image and place it face down onto the linoleum, hold it in place, and gently rub the reverse side to get the image to transfer. Sometimes the image will transfer lightly, but that's alright - so long as you can see the image well enough to carve it out.
Now that the image is transferred, I am ready to cut away the image on the linoleum from the rest of the linoleum block and begin to carve out the image using my Speedball carving tools.
Linoleum cutters come with a wide variety of blades you can use to cut out your image. I would suggest using the smaller, finer point blades for "trace-cutting" the image first. This is to outline what you are carving and to make it easier to carve away the big areas later. Once you have "traced" the image with the finer point blade, use the larger, wider mouthed blades to carve away larger spaces. When you are done carving out your stamp, it's a good idea to give it a test run to see if there are any touch ups you need to make. Use a dark color ink to start so that the imperfections can be easily found.
When I stamp the image, I can see small specks of linoleum around the image that I want to get rid of so that my image is nice and clean. Using a small tipped blade, I am able to touch up my stamp. It is a good idea to wash your stamp in warm water with mild soap to rid it of any bits and pieces of rubber that have gotten stuck to the surface of your stamp. Use an old towel to dry.
Now that my stamp is ready- let the printing begin!
I've been trying to brain storm fun and interesting ways to say THANK YOU to future customers for purchasing my illustrations. So far, I have come up with creating hand-made post cards, book marks, and tags that could be included as a gift with each print sold.
Here's the final product with my new lightbulb stamp!
Try it out and let me know how it goes!
Wednesday, August 6, 2014
One down... Many more to go!
Finished with the first illustration and working on my second of the Fall series! Yippeee! Feeling artsy-fartsy and inspired. :)
Tuesday, August 5, 2014
Fall Series No.: 1
Fall Series No.: 1 is nearly complete! A blackbird, sweet kitten, and darling little witch. More to come...
Monday, August 4, 2014
Twitterfied!
Follow Wild Heart Histories on Twitter at https://twitter.com/WildHistories !
Sunday, August 3, 2014
A Special Gift From Me to You!
Hi friends! My first FREE PRINTABLE is now ready for your creativity! Click on "Crafts" (located in the right gadget column) to check it out and be sure to check back often for more freebies to come. I already have a few more I'm wrapping up and getting ready to post!
Labels:
bird,
color,
crafts,
doodle,
embroidery,
flowers,
free,
freebies,
illustration,
printable,
sewing,
vintage
Saturday, August 2, 2014
A World of Octobers...
"I'm so glad I live in a world where there are Octobers."
- Anne of Green Gables, L.M. Montgomery
I am not trying to say I'm ready for Fall just yet. Oh no, NOT AT ALL. In fact, I could definitely get into the idea of endless summers. Being an elementary school teacher means summers are off for me and I do admit they are as sweet as pie!
What is also sweet as pie is Fall weather (I do not like humidity of Summer and it does not like me), pumpkin lattes, and the Fall change of color that happens on the East Coast. Being from the Bay Area of California, I had never experienced first hand the brilliance of color in anything as I do now here among the apple orchards, parks, and pumpkin farms. California pumpkins are this light and bright orange and the surrounding trees are evergreens so you don't get much variety. I thought all pumpkins were the same. Then, when my hubby and I moved to D.C., I discovered dark, almost burnt-orange pumpkins, accompanied by the sharp reds, deep velvety purples, and yellows of the tree leaves and harvest.... well I can't help myself can I? Fall became my favorite time of year.
Even though we have a bit of Summer left, it's time for me to start thinking about the Holidays including Halloween... I've been collecting Halloween post cards, advertisements, and photographs from the 1920's, 30's, and 40's to use in my Fall collection (to be placed on Etsy in the next few weeks).
A look at my desk and what I've collected so far:
A close-up of one of the cards I found! So sweet!
An uber-cute photograph I found and can't wait to figure out how I'll use it! My guess is it's of a class Halloween party - maybe 30's or 40's?
So off I go to work on some new art! Check back to see some of the finished products and to get the scoop on my upcoming Etsy store! In the meantime, tell me what you are doing to get ready for the Fall! Looking forward to hearing from you!
Labels:
Autumn,
craft,
drawing,
Fall,
Halloween,
illustration,
October,
painting,
photographs,
pumpkins,
retro,
scrapbooking,
vintage,
witches
Friday, August 1, 2014
Welcome!
Thanks for stopping by! I'm Nichole of Wild Heart Histories; a lifestyle brand that focuses on retro and vintage ideals while also embracing the arts and crafts movement of this generation.
I create illustrations, stationary, and porcelain goods (to name a few) that tie in my love of vintage, wild nature, and art. My hope is to market and sell these items on Etsy - as soon as they are I will post an announcement here! The pieces can be light and airy, or more reflective and spiritual using imagery from nature and interesting pieces of ephemera from the late 1800's all the way through the 1960's.
More and more people are finding ways to return to their roots - whether it be starting an urban garden, using salvaged goods from a local flea market to make a house a home, or using grandmother's recipe for old-fashioned tea cakes, there is a definite nod to our past. And why shouldn't there be? Things might not have been perfect in the "good ol' days", but there is something to be said for craftsmanship, making something from scratch, and a good day of hard work and elbow grease.
I feel a definite tie to this movement and work hard to make sure my art reflects those ideals, histories, and spirit. Each work is completely hand made and I use a variety of different medias such as ink, watercolor, scrapbook paper, photographs, and old letters (see an example of my work below).
I hope you enjoy my blog as I set off on this wild adventure of mine and are able to find something for you within it! Be sure to check back often for weekly updates and go to the projects page for free printables and fun DIY ideas!
My Etsy store should be up and running within a few weeks time so I hope you will stop back by to check out my collection soon!
Labels:
art,
bird,
collage,
craft,
drawing,
ephemera,
flower,
illustration,
ink,
mixed media,
retro,
vintage
Subscribe to:
Posts (Atom)